CSA Tip: Make Crockpot Vegetable Broth from Veggie Scraps
I apologize to those of you who have already read this tip in previous year’s posts. I just feel so strongly about sharing it that I am compelled to re-post it every year. If you have read about homemade veggie broth but haven’t tried it yet, please do. You won’t regret it.
*******************************************************
We all want to eat less processed food, but supermarket broth is just so convenient to have on hand and making it from scratch can be a pain. While surfing the net for veggie broth recipes, I came across an ingenious and simple way to use up vegetable scraps and make broth while I sleep! http://www.goodforgreen.blogspot.com/2009/03/crockpot-vegetable-stock.html.
Here is what I learned from this and a few other web posts…simply save most vegetable scraps meant for the garbage or compost pile in a large re-sealable plastic baggie stored in the freezer. Add to it as you cook. When the baggie is full, dump it in the Crockpot and add enough water to cover.
- Add a few peppercorns and/or a small amount of herbs (like thyme or parsley) or dried herbs tied in cheesecloth.
- If desired, add other veggies to round out the flavor (celery, carrot, onion, tomato, turnip, and mushrooms are especially good)
- Turn on low and cook for 4-6 hours.
- Sieve out solids (use them now for compost), let broth cool, then portion and freeze, or use within 4 days.
Non-waxy and non-bitter scraps work best and can also include onion skins (great for color), garlic and garlic skin, bell pepper scraps (avoid seeds), Kohlrabi stems, stems from greens (beware of beet greens which may color the broth), zucchini and summer squash ends, tomato ends/seeds/pulp, carrot ends and peels, asparagus or green bean ends, choi stems and greens, and mushroom stems. Sparingly use strongly flavored vegetables such as broccoli, cauliflower and cabbage as they can overpower the taste. Avoid waxy vegetables (cucumbers), bitter seeds and pits, and beet scraps. Potato skins can add a starchy element, so I tend not to use them.
Just remember to get in the habit of washing all vegetables (even the onions) before you peel or de-stem them if you are planning to use them in the broth. You don’t want any sand or dirt in your broth!!
I have been following this method with great results on a weekly basis since I first discovered it. After years of experience with this method I have learned a few things…
- Vegetable broth can also be made in a regular pot on the stovetop and only takes 1- 1½ hours to cook.
- The longer the mix cooks, the more bitter the flavors can be, so time it so that you turn on the Crockpot right before bed and sieve out the solids right when you get up in the morning.
- Homemade vegetable broth is flavorful enough to use as a substitute for prepared chicken broth, as long as you salt it.
- This will easily become a habit. Try it!!
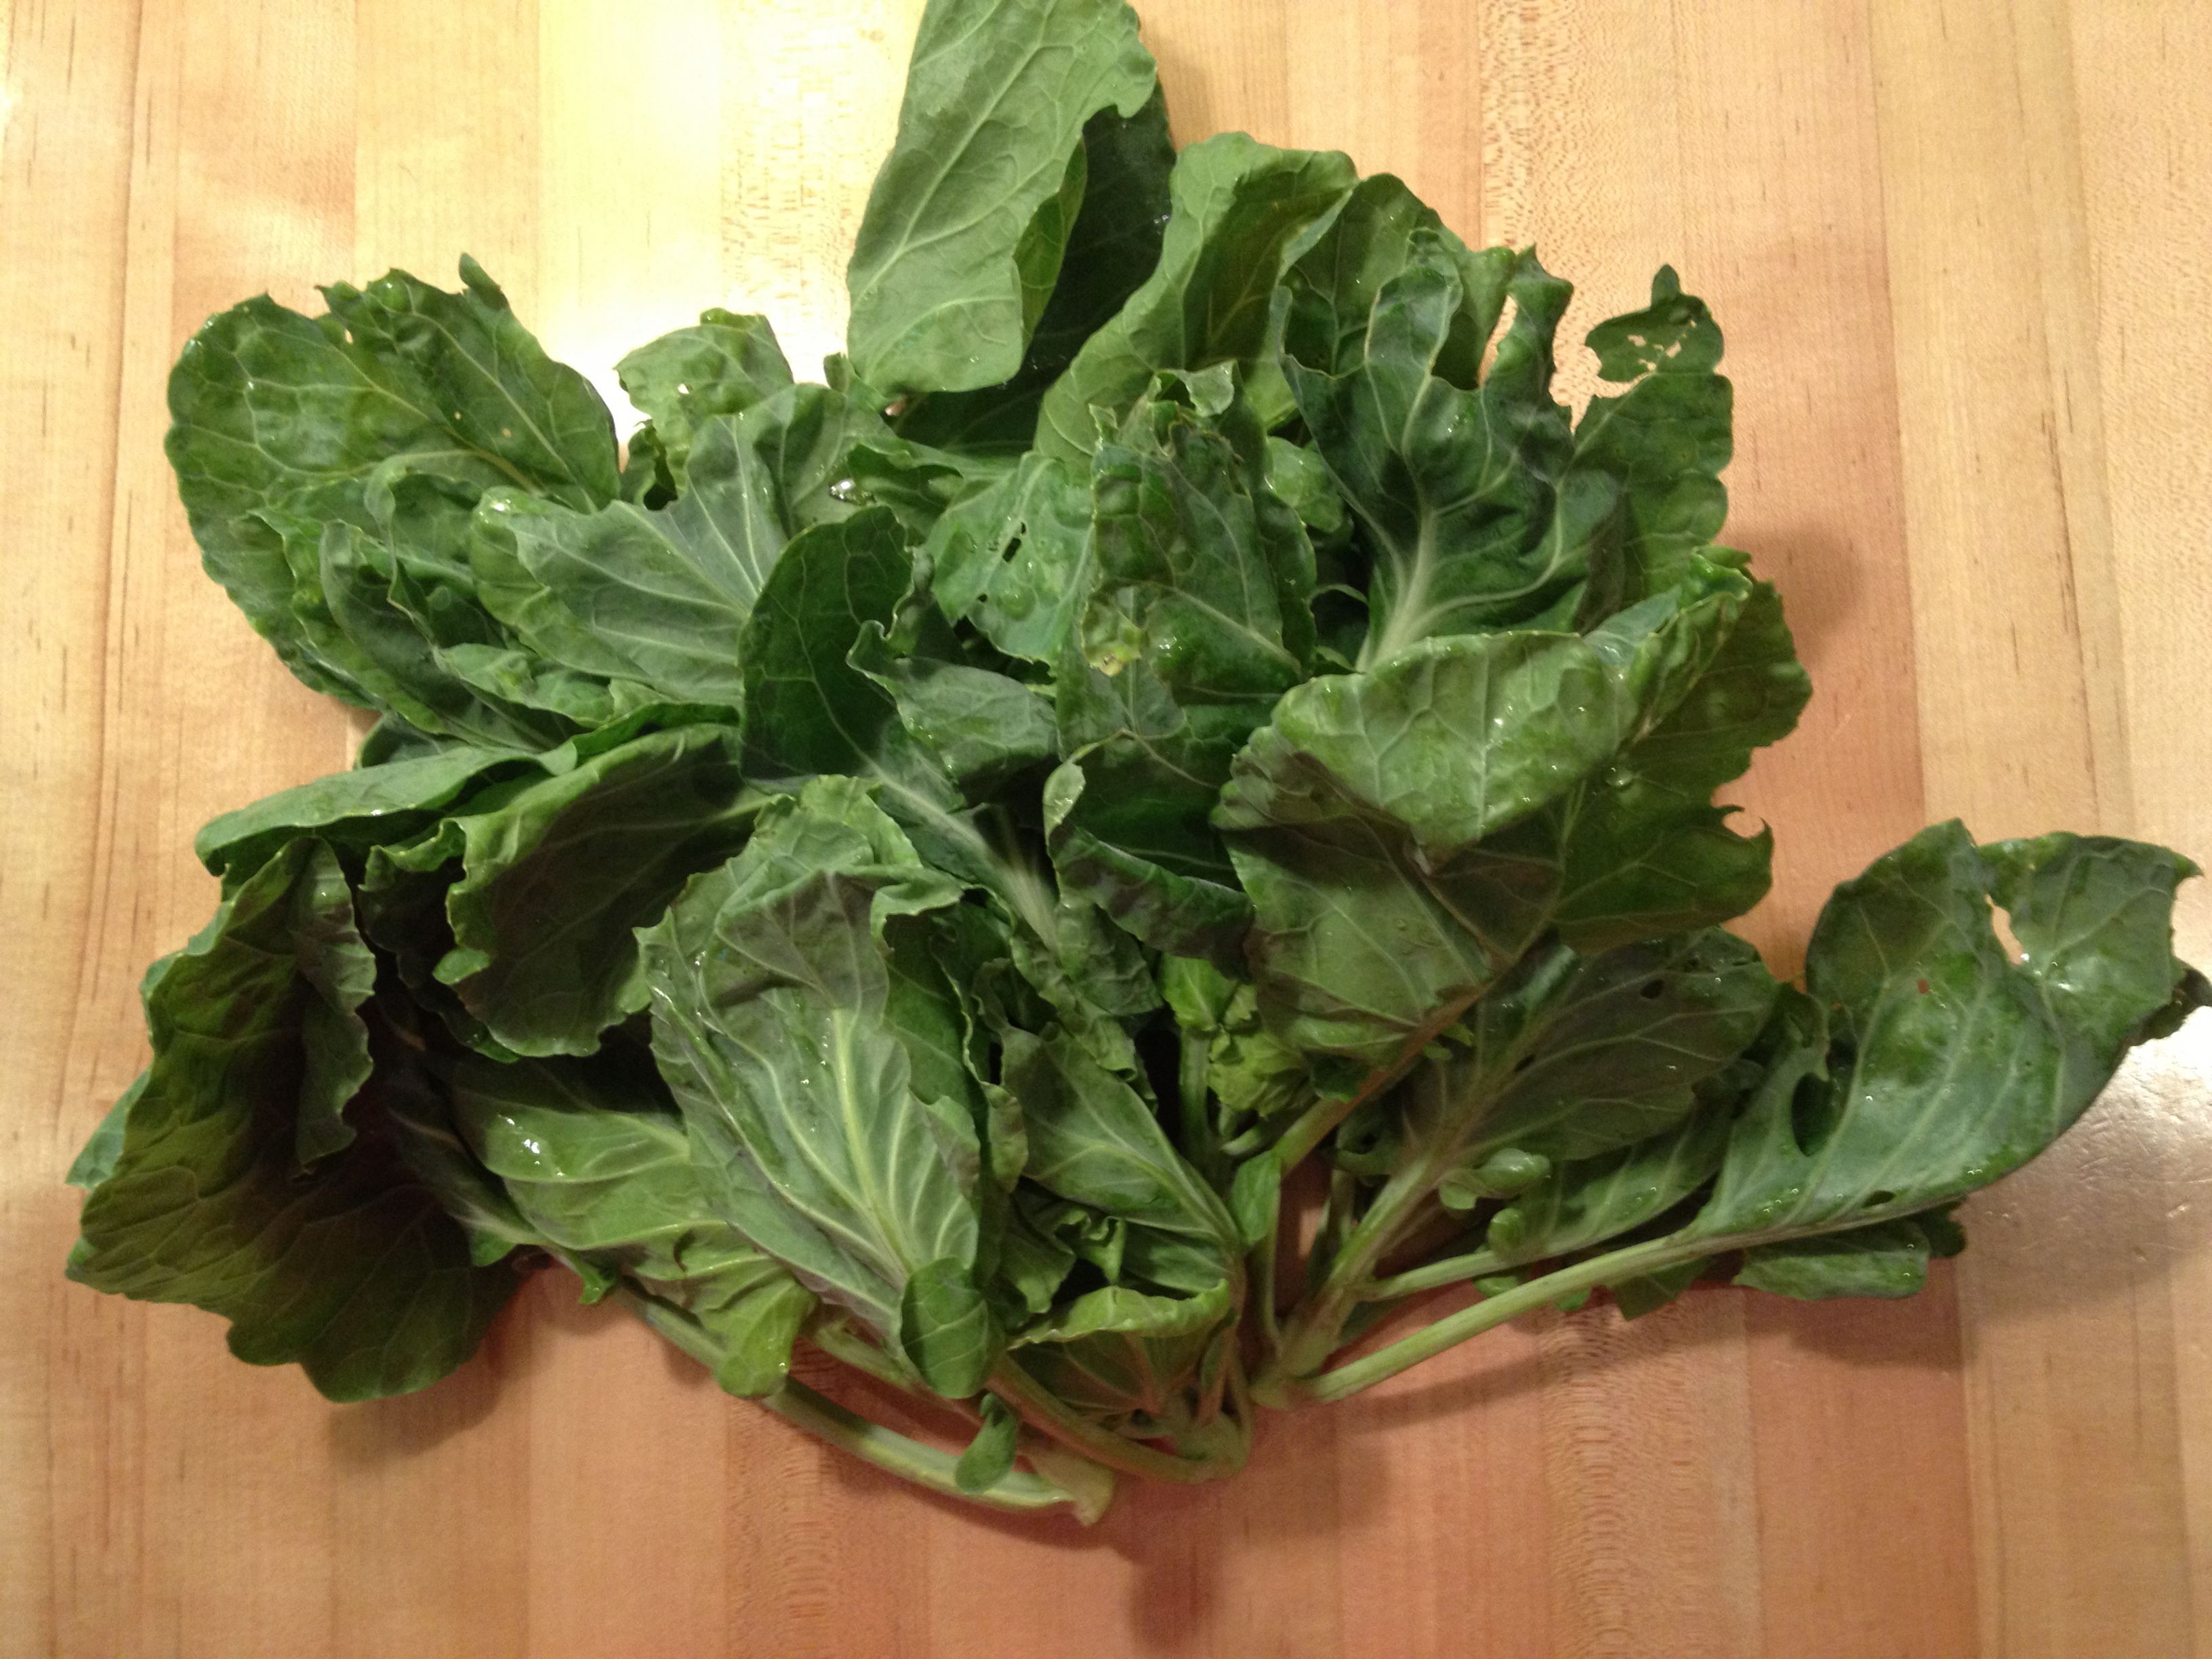 Featured Item–Brussels Sprout Greens
If you are like me, you have never seen or heard of Brussels sprout greens before. Who would have ever thought that the greens growing out of those funny-looking sprout stalks are edible! Yet, not only are they edible, they are delicious!
Brussels sprout greens are a sturdy green that are most frequently compared to collards. I find them a little more tender than collards but with a mild, faintly cabbage-y flavor.
I couldn’t find much nutritional information specifically on Brussels sprout greens, but I do know much of the time, the leafy tops of vegetables are often the most nutritious part of the plant. In general, Brussels sprouts are very good sources of fiber, vitamins A, C, K and B6, are significant sources of folate, potassium, and manganese. They contain one of the highest levels of glucosinolates found in vegetables, compounds thought to be protective against cancer. Consumption of Brussels sprouts is also believed to lower cholesterol (http://www.whfoods.com/).
Because these greens tend to have some “chew” they are often cooked to soften them up a bit. However, they are also delicious when cut into thin ribbons and eaten raw (like in a coleslaw or salad). This particular thin cut of the green seems to render them more tender, especially when tossed with a tart vinaigrette.
The only problem I have with these wonderful greens is that you don’t get much to a bunch and greens wilt down so much when cooked. So I came up with a couple of recipes that use smaller amounts (see below). Both recipes pair the greens with beans (a favorite combination of mine), but one is a vegetarian soup and the other features bacon and greens with black-eyed peas in a tasty side dish.
Another way to “stretch” these greens is to combine them with other cooking greens. Just remember that they will need to cook a little longer than tender greens like spinach or chard (cooking time is more similar to kale leaves). Or if you need to stretch them out over a longer period, blanch them and add them to other greens as you get them. They will keep 4-5 days blanched, or can be blanched and frozen for even later use.
As for stems of Brussels sprouts tops, they definitely seem more tender than collard stems. I cut off the bottom half of the stem (which I will use for veggie broth) and chopped up the rest, including the rib, with the leaves. I had no problem with the stems getting tender when cooked.
*************************************************************************
Pickled greens are a southern favorite. I love them with this creamy white bean soup.
Creamy White Bean Soup w/ Pickled Brussels Sprout Tops Serves 4
INGREDIENTS:
For soup:
– 2 teaspoons olive oil
– 1 small onion, minced
– 2 cloves garlic, crushed
– 1 teaspoon salt
– 1/4 teaspoon dried thyme leaves
– 2 bay leaves
– 1 lb 13 oz can cannellini beans, drained and rinsed
– homemade or purchased salt free vegetable broth (if using purchased broth, reduce salt)
For pickled Brussels sprout tops:
– 1 teaspoon olive oil
– 3 cups Brussels sprout tops, rolled tightly, thinly sliced into chiffonade, and roughly chopped
– 1 clove garlic, crushed
– 1/4 teaspoon salt
– 1/2 teaspoon sugar
– 1/8 teaspoon black pepper
– 1/2 teaspoon yellow mustard seeds
– 1 large bay leaf
– 1/4 teaspoon crushed red pepper
– 1/4 cup home-made or purchased salt free vegetable broth
– 1 tablespoon cider vinegar
METHOD:
1. For soup: Heat 2 teaspoons olive oil in a medium soup pot over medium-low heat. Add onion, garlic, salt, thyme leaves, and bay leaves. Cook, stirring occasionally, until onion is soft, about 5-8 minutes. Add beans and broth. Increase heat and bring to a boil. Reduce heat so that soup is at a simmer. Cook, stirring occasionally, for 20 minutes. Remove bay leaves. Puree soup in batches in a blender until completely smooth.
2. For Pickled Brussels Sprout Tops: Heat 1 teaspoon olive oil in a large skillet over medium heat. Add Brussels sprout tops, garlic, salt, sugar, pepper, mustard seeds, bay leaf, crushed red pepper, and broth. Cook, stirring occasionally until greens are tender and broth has cooked off, about 5-8 minutes. Remove bay leaves. Stir in cider vinegar. Cook, stirring constantly, until vinegar cooks off, about 1 minutes.
3. Ladle soup into 4 soup bowls. Garnish with pickled greens. Serve hot.
********************************************************************************
Black eyed peas and greens are another Southern favorite. I could eat this for breakfast, lunch or dinner.
Brussels Sprout Greens with Black Eyed Peas Serves 4
INGREDIENTS:
– 2 slices center cut bacon, minced
– 2 teaspoons extra virgin olive oil
– 1/4 cup minced onion
– 2 garlic cloves, minced
– 1/2 jalapeno, minced
– 1 bunch Brussels sprout greens, bottom two-thirds trimmed, cut into bite-sized pieces
– 3 tablespoons vegetable or chicken broth
– 15.5 ounce can black eyed peas, drained and rinsed
– 2 teaspoons cider vinegar
– salt and pepper to taste
METHOD:
In a medium pot, cook bacon over medium heat until fat is rendered and bacon is crisp. Remove bacon with a slotted spoon to a paper-towel lined plate to drain. Add two teaspoons olive oil to bacon fat in pan. Place on medium-low heat. Add onion, garlic, and jalapeño. Cook, stirring frequently, until vegetables are soft, about 5 minutes. Add greens and broth and stir well. Cover pot and cook for 8 minutes. Add beans and bacon and cook, covered and stirring occasionally, for 3 minutes, or until beans are warmed through. Remove from heat. Stir in cider vinegar. Season to taste with salt and pepper.
**********************************************************************
My husband and I recently had a great dinner at the Infinity Bistro in Norfolk. I can’t get their grilled calamari salad out of my head. I recreated the recipe using cabbage from the farm. YUM!
Grilled Calamari with Cabbage Slaw Serves 4
INGREDIENTS:
– 3 tablespoons non-fat Greek yogurt
– 3 tablespoons light mayonnaise
– 3 tablespoons rice wine vinegar
– 1 jalapeno pepper , seeded and minced
– 3 tablespoons skim milk
– 1 1/2 tablespoons minced capers
– 4 cups shredded cabbage
– 1 large red bell pepper, julienned
– 2 large carrot, julienned
– 1 pound calamari, bodies cut into rings, tentacles halved
– about 1 cup milk
METHOD:
1. Place calamari in a medium bowl and pour milk over just to cover. Refrigerate for 6-12 hours.
Whisk yogurt, mayonnaise, vinegar, jalapeno, milk, and capers. Season to taste with salt and pepper. Refrigerate until ready to use. Place cabbage, red pepper and carrots in a medium bowl and toss to combine well.
2. Preheat grill. Remove calamari from milk and pat dry with paper towels. Oil grill grate (or a grill pan or topper since the pieces are small). Place calamari quickly on grill and grill for about 3 minutes per side (do not overcook or calamari will be tough).
3. Toss cabbage mixture two-thirds dressing. Divide evenly among 4 plates. Top with hot grilled calamari and drizzle with remaining dressing. Serve immediately.