I am so glad to be back to farm this week after a vacation in Yellowstone National Park. While the park was absolutely stunning, sadly there weren’t too many fresh veggies to be found there. I was excited to come back to sweet green peppers, including bell, shishito and padron peppers. More on that in a bit.
I would like to start my post by announcing that this evening I will be giving a Quick Pickling demonstration at the Granby Public Library from 6:30 – 7:30. This is a free demo, but registration is recommended. For more details click here.
Featured Item—Sweet Green Peppers
Sweet green peppers tend to get the shaft. They are thought to play second fiddle to their older siblings, the bright red peppers that are the quintessential summer vegetable. But green peppers are a wonderful vegetable in their own right. In fact, green peppers are an essential ingredient in the “Holy Trinity” of vegetables (along with onions and celery) that form the basis for Cajun/Creole dishes. They are crisp and tangy with a just a slight bitter edge that gives them interest and depth. Not surprisingly, they are also quite healthful, being full of vitamins A, C, B6, fiber and many important carotenoids, while carrying a very low calorie and fat load.
There are several varieties of sweet peppers, many of which are green earlier in their maturation. If left to grow for longer periods they will turn red, orange, or yellow. Some varieties stay green throughout the growing process. Green peppers also come in different shapes, the most familiar being the bell shaped sweet green pepper. But other varieties, like the Cubanelle type, can be long and slender.
We are lucky enough to sample several varieties of sweet peppers at the farm, many of which are shades of green now, but which will start coming in red, orange or yellow as the season progresses. But lest we sit back waiting for the rainbow and miss out on the pot of gold, here are some ideas for using up those sweet green peppers that are available now in the distribution.
Raw
Sweet green peppers are great in salads or as a part of vegetable platter. They are also wonderful quick pickled where they keep their fresh, irresistible crunch.
Cooked
The list here is potentially endless…cooked in omelets or frittatas; roasted or grilled as part of a salad or side dish; roasted and pickled (see recipe below); stuffed and baked; baked in casseroles; cooked in soups/stews; featured in Cajun/Creole cooking; grilled on shish kabobs; or quickly stir-fried with your other favorite veggies or meat.
Choose sweet green peppers that are smooth without wrinkles, bruises, or holes and whose stems appear green and fresh. Store peppers in plastic in the refrigerator, where they should last at least a week.
- - 5 large green bell pepper
- - 1 tablespoon cumin seeds
- - 1 small onion, minced
- - ½ cup cider vinegar
- - 3 peeled garlic cloves, smashed lightly with a knife
- - 1 bay leaf, torn into 3-4 pieces
- - 1 teaspoon dried oregano
- - 1¼ teaspoons salt
- - ¼ teaspoon black pepper
- - 2 tablespoons extra virgin olive oil
- Preheat oven to 400 degrees. Oil or spray a large rimmed baking sheet. Cut top and bottom ends of peppers and reserve for another purpose (they are great to snack on or to add to soups or salads).Make a cut lengthwise from top to bottom, then use a knife to go around the inside edges to remove the seeds and membranes. You will end up with a long strip of pepper. Place skin side up on one layer on pan. Spray or brush with oil. Bake for about 20-25 minutes, or until pepper is soft and skin is blistered. Remove from oven and place pieces in a plastic baggie. Seal and let sit for 15 minutes to loosen skins.
- In a small skillet, heat cumin seeds on medium heat, stirring frequently, until fragrant and toasted, about 3 minutes. Remove from heat and allow to cool.
- Place onion, vinegar, garlic cloves, bay leaf, oregano, salt and pepper in a small saucepan over medium heat. Bring to a boil. Reduce heat and simmer for 1 minute. Remove from heat. Add cooled cumin seeds and olive oil. Allow to cool while you peel the peppers.
- Remove pepper pieces from bag and remove skins. Cut peppers into strips and place in a bowl. Pour vinegar mixture over peppers and carefully stir mixture, being careful not to break-up peppers but getting the vinegar and onion mixture to fully coat the pieces.
- Pour into a glass jar. Press down gently on solids to submerge as many of the peppers as possible in the vinegar. Allow to cool for one hour, then cover with a tight fitting lid and refrigerate. Use within 2 weeks.
 Shishito and Padron Peppers
Shishito and Padron peppers are an interesting variant of sweet green peppers. Peppers and chiles are typically differentiated by their level of heat. Chiles are bred to be spicy, whereas peppers are considered their milder cousins. But what to call the varieties that are sometimes sweet and sometimes hot? Like a game of Russian roulette, some peppers have you guessing until your mouth is on fire and you are reaching for the ice water. Such is the case with both shishito and padron peppers, two different yet similar pepper varieties we are picking now at the farm.
Shishito peppers are popular in Japan, where they are often made into tempura or blistered and sprinkled with sea salt and togarashi (a Japanese condiment sprinkle made from nori seaweed, chilis, and sesame seeds). They are typically served as an appetizer or snack. Shishitos are light green, thin walled as well as thin in shape, with a slightly wrinkled appearance (see peppers on the right in the photo). Typically harvested when they are young, most shishito peppers will be mild in flavor. It is estimated that that 1 in 10, or even 1 in 20 will be fiery hot, but this ratio narrows the longer the peppers are left on the vine.
Padron peppers are more bell pepper-like in shape, and are also typically harvested young (1 1-1/2” long) when they are mostly mild. Again, 1 in 10 or 1 in 20 are spicy, with the spiciness quotient increasing the longer the fruit is left on the vine. These peppers also have a thin skin, yet are slightly darker green and a bit richer in flavor than Shishitos (these peppers are shown on the left in the photo above). They are often served as tapas in Spain. Both shishito and padron peppers, like your typical bell peppers, will eventually turn red on the vine, but rather than being a sign of sweetness, their color is a bright indicator of their heat level. Perhaps this is when they are best referred to as chiles.
Both shishitos and padron peppers are so good simply blistered on the grill or in a saute pan and sprinkled with sea salt, that I hesitate to recommend them any other way, at least until you have tried them. Below is a recipe for grilled blistered shishito peppers. Padron peppers can be prepared the same way. Here are two references for blistered padron peppers, one cooked on the grill and one done in a saute pan.
- For grilled padron peppersClick here
- For pan roasted padron peppersClick here
Even though they are awesome blistered on the grill or in a pan, there is no reason these little peppers cannot be used like any other pepper in your culinary adventures. Try putting them on kabobs, adding them to ratatouille when the tomatoes are harvested, using them in chiles or stews, or pickling them. If you like the simplicity of blistering them on the grill, under the broiler, or in a saute pan, you can dress them up by tossing the cooked morsels with togarashi, sesame seeds, or flavored salts, tossing them in sauces like miso, adding them to pasta or grains, or stirring chopped bits of them in with burger, meatball or meatloaf mixes.
Simple Grilled Shishito Peppers (click on title for printable PDF version)
INGREDIENTS:
– 1 quart shishito peppers, rinsed well
– 1 tablespoon light olive oil
– sea salt and pepper to taste
METHOD:
Preheat grill (preferably charcoal). Set grill to medium or medium low heat. Spray grill pan with cooking spray and brush with oil. Place peppers on grill pan and cover grill. Cook peppers, turning every minute or two until peppers are soft and slightly charred. Serve immediately. For an interesting twist, toss cooked peppers with 1 teaspoon sesame oil and 1 tablespoon sesame seeds, or with togarashi. Serve hot.
•••••••••••••••••••••••••••••••••••••••••••••••
Here are few new recipes using other items in the share this week including cherry tomatoes, parsley, basil, cucumbers and baby eggplant.
Tabouli is a very lemony Middle Eastern bulgur salad with tomatoes, cucumbers, and parsley that is traditionally more parsley than bulgur. While I like parsley and lemon, I prefer a more toned-down version. I like to make tabouli with cherry tomatoes because they hold together in the salad better and throw off less water than regular tomatoes.
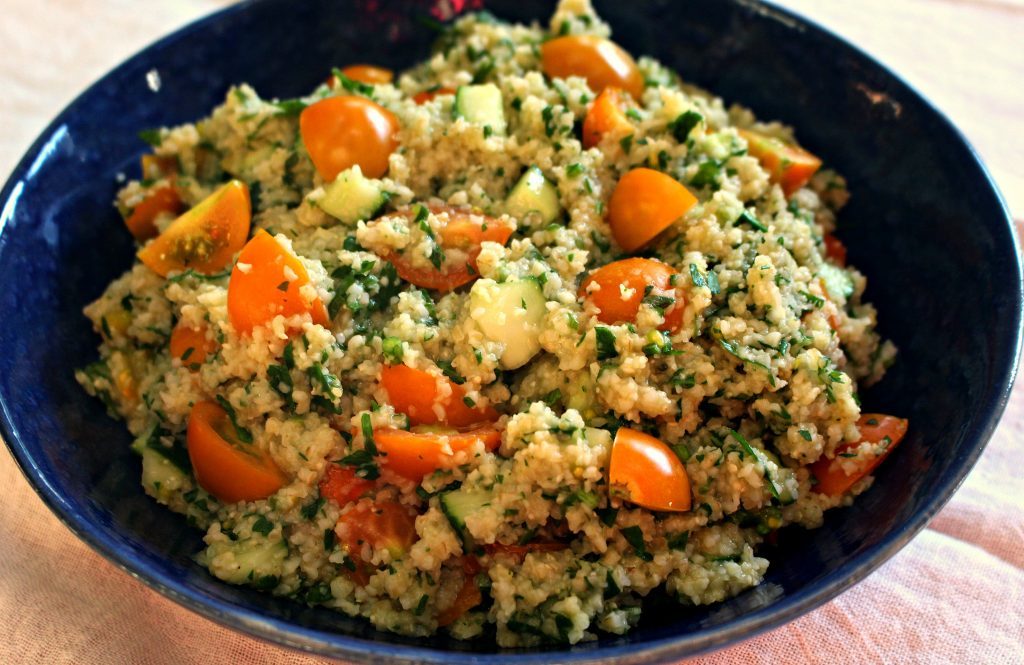
Cherry Tomato Tabouli Serves 4
INGREDIENTS:
– 1 cup raw bulgur
– 1 1/2 cups water
– 1/2 teaspoon sea salt
– 1/2 cup minced fresh parsley, or more to taste
– 2/3 pint cherry tomatoes, quartered
– 1 medium cucumber, seeded and diced
– 2-3 tablespoons freshy squeezed lemon juice, or to taste
– 1 tablespoon extra virgin olive oil
METHOD:
- Place water and salt in a medium saucepan and bring to a boil. Stir in bulgur. Turn off heat and cover. Allow to sit for 20 minutes. Remove lid and allow to cool to room temperature, stirring frequently to facilitate cooling.
- In a medium bowl, mix cooled bulgur, parsley, tomatoes, and cucumbers. Mix in 2 tablespoons lemon juice and 1 tablespoon extra virgin olive oil. Taste and add additional lemon juice or parsley to your taste. Serve at room temperature or after chilling in the refrigerator.
*********************************************
I love finding new ways to serve baby eggplant. This pickled version is a delicious condiment to serve alongside grilled meats on a hot summer day. It is best served at room temperature. The recipe was adapted from Food.com
You can use regular eggplant for this recipe. However, depending upon how bitter the eggplant is, you may want to consider salting and rinsing it first (personally, I have never found it necessary to salt eggplant that comes from Holcomb farm).
Pickled Baby Eggplant Makes about 2 ½ cups
INGREDIENTS:
– baby eggplant, cut into 1/2″ cubes to make 4 cups
– 1 large onion, thinly sliced
– 1 teaspoon salt
– 2 cups red wine vinegar
– 1 1/2 cups water
– 2 cloves garlic, crushed
– 1 tablespoon minced fresh parsley
– 1 tablespoon minced fresh basil
– 1 teaspoon minced fresh oregano
– 1/4 teaspoon red pepper flakes
– 1/2 teaspoon salt
– 1 bay leaf
– about 1/4 cup extra virgin olive oil
METHOD:
- Place eggplant, onion, 1 teaspoon salt, red wine vinegar, water, and crushed garlic in a medium saucepan placed over medium heat. Bring to a boil, then reduce to a simmer. Cook, stirring occasionally, for about 12-15 minutes or until eggplant is soft but still holds its shape. Drain in a colander and allow to cool.
- Place cooled eggplant in a bowl. Gently stir in parsley, basil, oregano and red pepper flakes. Pour into a jar (a quart jar works well). Place bay leaf on top of eggplant. Cover completely with olive oil. Allow to sit for 3-4 days before serving. Bring to room temperature. You can pour off some of the oil before you serve it, but it tastes great with at least some of the olive oil mixed in with the pickled eggplant.
Note:
Refrigerate for up to 2 weeks.